After this you will be able to;
- Create and manage Salesforce administrators users
- Create and invite schedulers to access the Skedulo Web App
- Create and invite resources to access the mobile app
Overview of user records
User records are created inside the ‘Setup’ area within Salesforce. Only users with the right permissions will be able to access the ‘Setup’ area to create user records.
Access create user screen
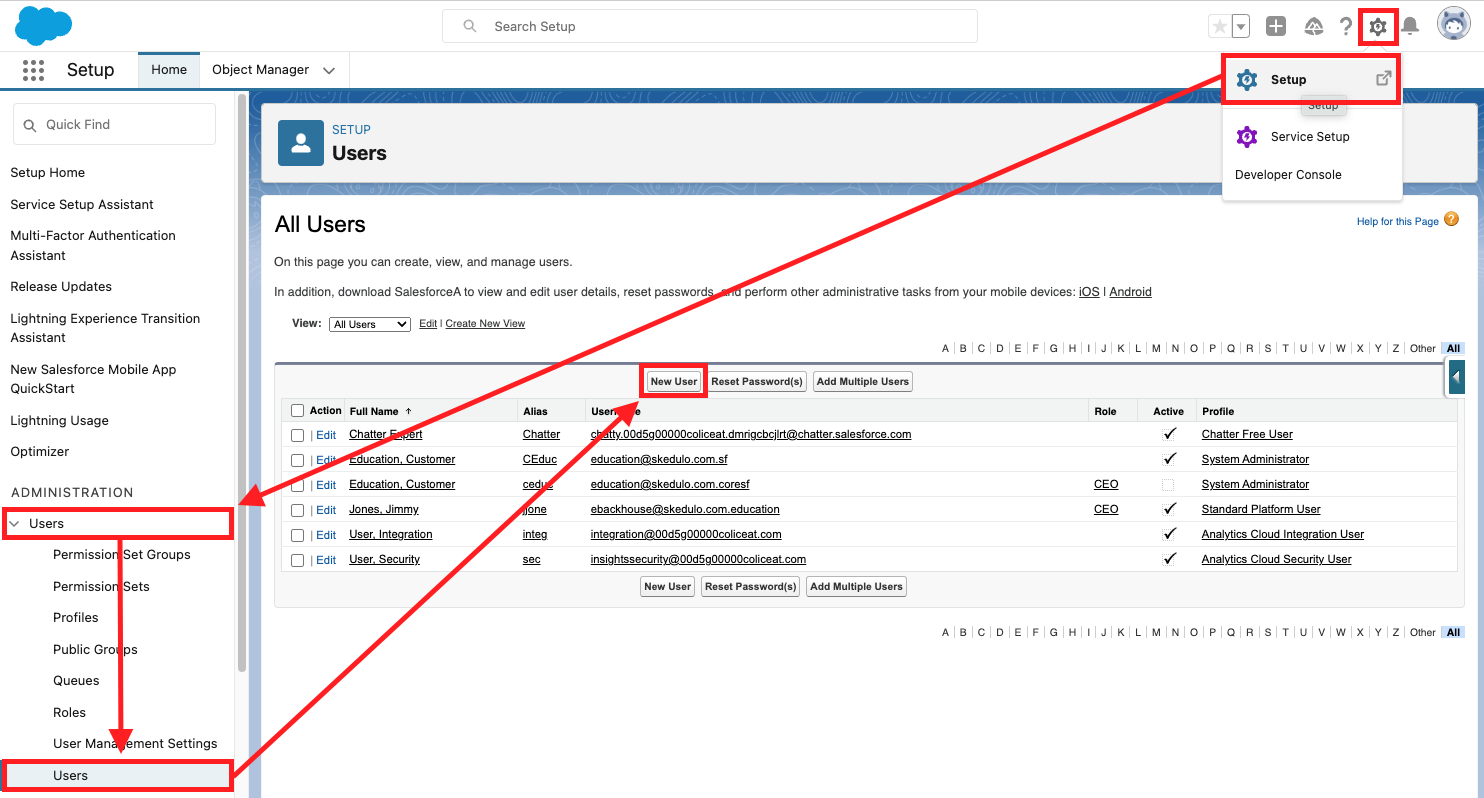
- Log into Salesforce
- Click the ‘Gear Icon’ in the top right corner
- Click the ‘Setup’ menu item
- Navigate to the ‘Administration’ section on the left hand side
- Click on the ‘Users’ tab with the down arrow, opening the sub menu
- Click on the ‘Users’ tab within the sub menu
- Click on the ‘New User’ button at the top of the user list
When you arrive at the create user screen, just wait for a moment as we want to highlight a few things firstly. We will continue the process of creating a new user later in this lesson.
If you followed the steps above, you should see the create user screen. Let’s take you through the steps required to create and invite your first user.
There are a number of steps that must be performed when setting up users to ensure all the right data has been assigned against the user record. If your users are experiencing any issues when trying to log in or access Skedulo applications, 9 times out of 10 it would be because one of the following items was missed or configured incorrectly.
| Step | Item | Details |
|---|---|---|
| 1 | Salesforce license | When setting up your users, the appropriate licences must be assigned as per your contract agreement. If a user does not have the correct licences assigned, they will not be able to access the solution. |
| 2 | Salesforce profile | A Salesforce profile is a required field when creating users. A profile defines the base level of access to objects and data, and what they can do within the application. Salesforce offers standard profiles and the list of available profiles will change depending on the licence selected in step 1. |
| 3 | SkedUserType | The SkedUserType must be populated for all Skedulo users. The Sked User Type is a multi-picklist field against the user record that is used to give access to various Skedulo applications. This field defines what the users role is within Skedulo and is required when proving access to the Skedulo Web and Mobile App. |
| 4 | Permission sets | A permission set is a collection of settings and permissions that give users access to various tools and functions. Permission sets extend users’ functional access without changing their profiles. Permission sets may also be group together which called a ‘Permission set group’. |
| 5 | Skedulo licence | In addition to the Salesforce licence outlined in step 1, all users accessing Skedulo data model and applications must have a Skedulo license assigned. |
Understanding Salesforce licences & profiles
When setting up your users, the appropriate licences must be assigned as per your contract agreement. When you engage our services using our Skedulo on Salesforce solution, Skedulo will order licenses from Salesforce on your behalf and provision them to your environment. If a user does not have the correct licences assigned, they will not be able to access the solution.
When creating Skedulo users, two types of licences are required in order for your users to gain access.
| Salesforce user licence | Base licence that is required to access the Salesforce platform. |
| Skedulo licence | Additional licence that is required for users to access Skedulo data and applications |
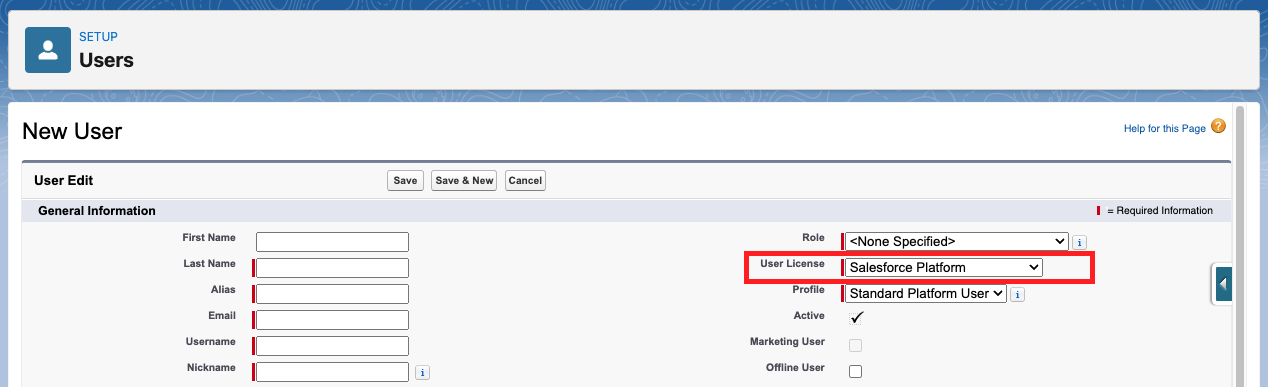
Step 1 – Adding a Salesforce licence
When creating a user record, the ‘User Licence’ field must be populated in order to save the record. The ‘User License’ field is where you can select a Salesforce licence. There are two types of Salesforce licences that Skedulo users need;
- Salesforce – This user licence is for all system administrators and advanced users that require a high level of access.
- Salesforce Platform – This user licence is for schedulers, operations and deskless worker users.
Step 2 – Adding a Salesforce profile
Depending on the Salesforce user license you have selected, you will be presented with different options when allocating the profile type. Salesforce has default profiles that can be used but we find some customers also create their own. Because Skedulo uses permission sets to control access, profile types can vary depending on your solution build and other applications you might have installed into your solution.
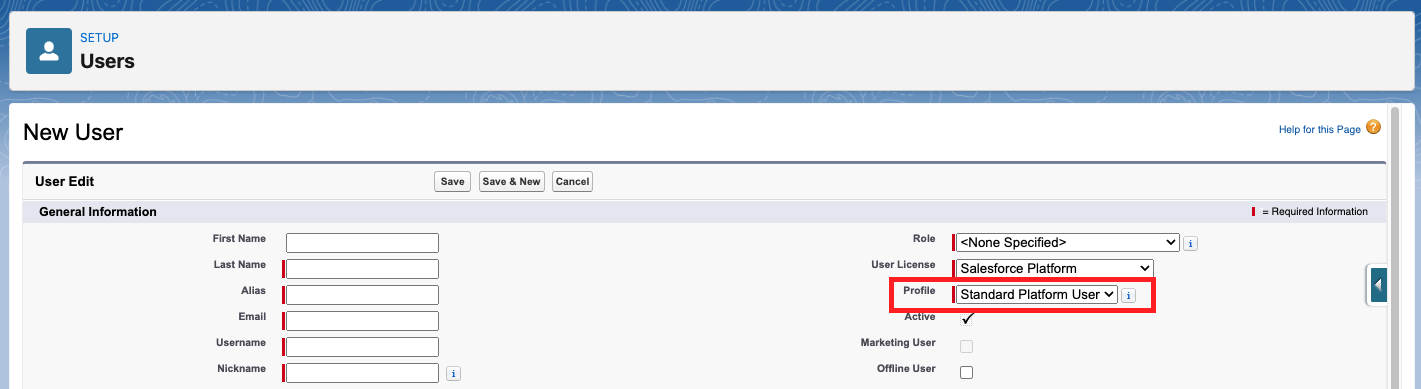
For customers using the Healthcare solution, Lumary profile types are used to control access to their data model. To understand which profile types you should use, please consult with Lumary or alternatively check out their help centre article 'Profile object settings'.
Step 3 – Setting the Sked User Type
The Sked User Type is a multi-picklist field against the user record that is used to give access to various Skedulo applications. It is a required field for all users who use Skedulo.
| Administrator | A Skedulo administrator has the highest set of permissions and can perform all operations as well as view and edit all data. Administrators can access settings to configure the solution from within the Web App. |
| Scheduler | A scheduler is one step below an administrator and can perform all operations (except exclusive administrator operations) as well as view/edit and add data. Scheduler user types are given access to the Skedulo Web App. |
| Resource | A resource is the lowest of the permission sets and comes with some restrictions. Resource user type allows a user to access the mobile application. |

Creating the user record
Okay, now that you have some background information, let’s create a new user record. While in the create user screen;
- Populate all the required fields marked with a red line
- Set role as <None Specified> or select a role if configured correctly
- Choose a user licence
- Choose a profile
- Allocate the SkedUserTypes for the type of user record you are creating
- Choose the correct timezone
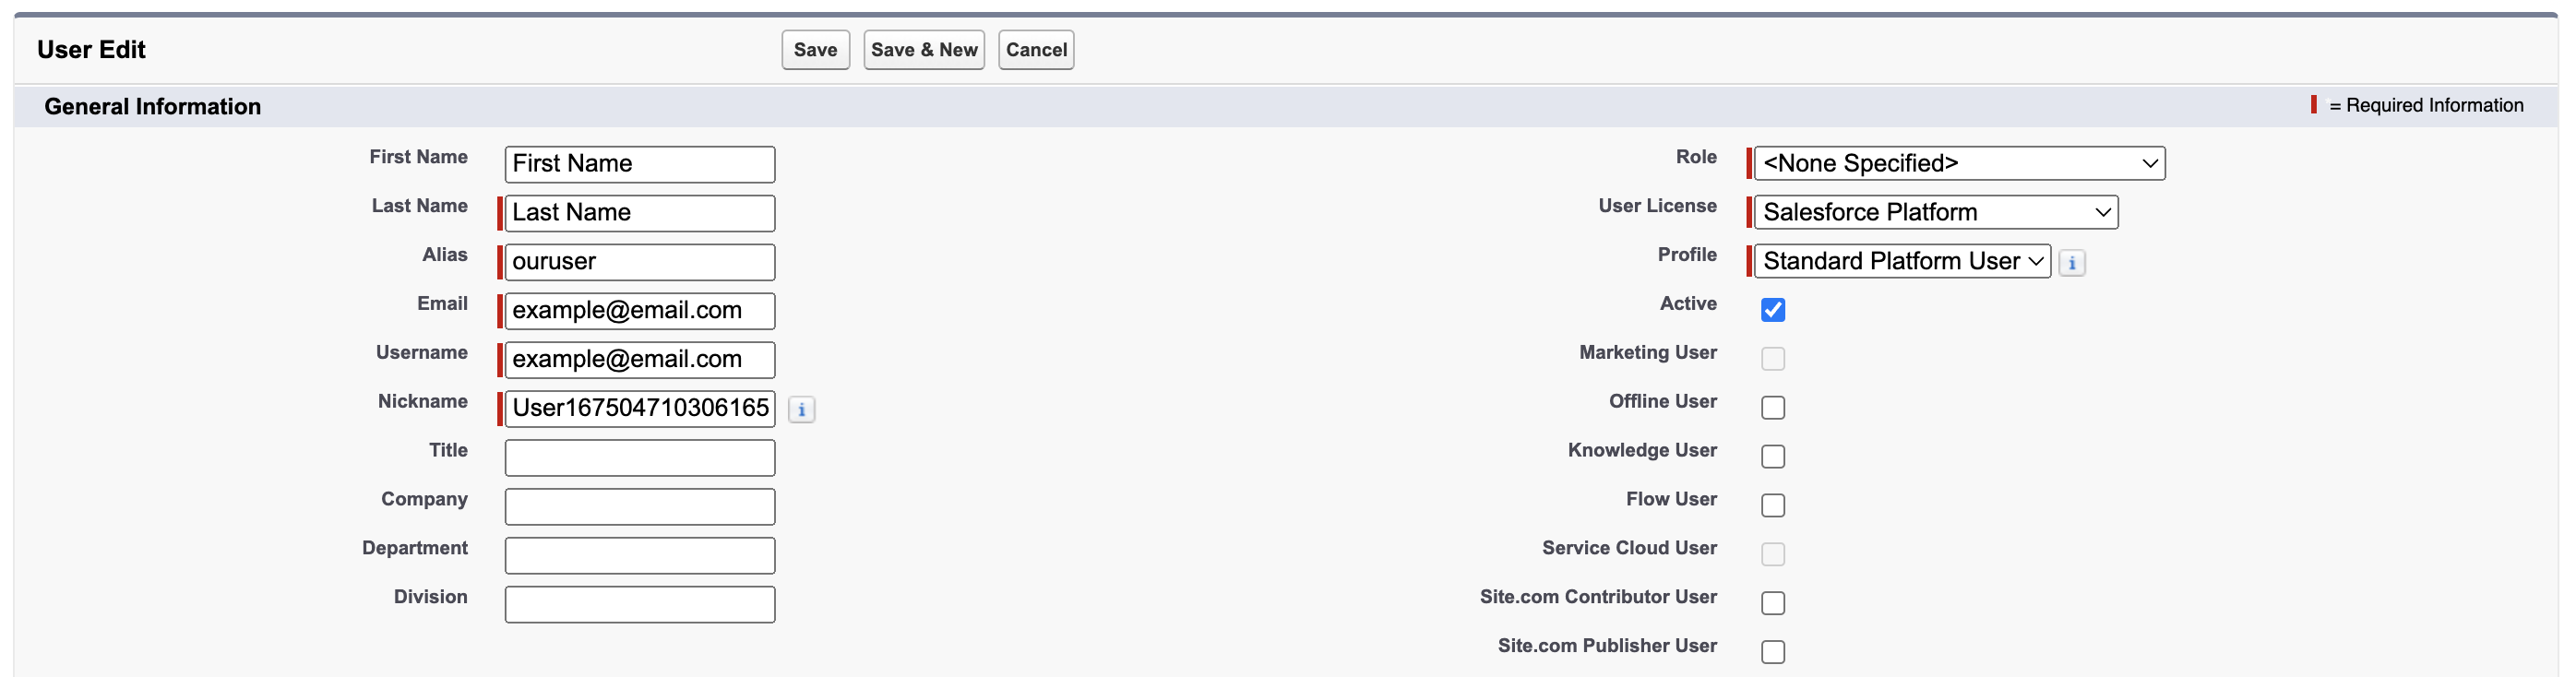
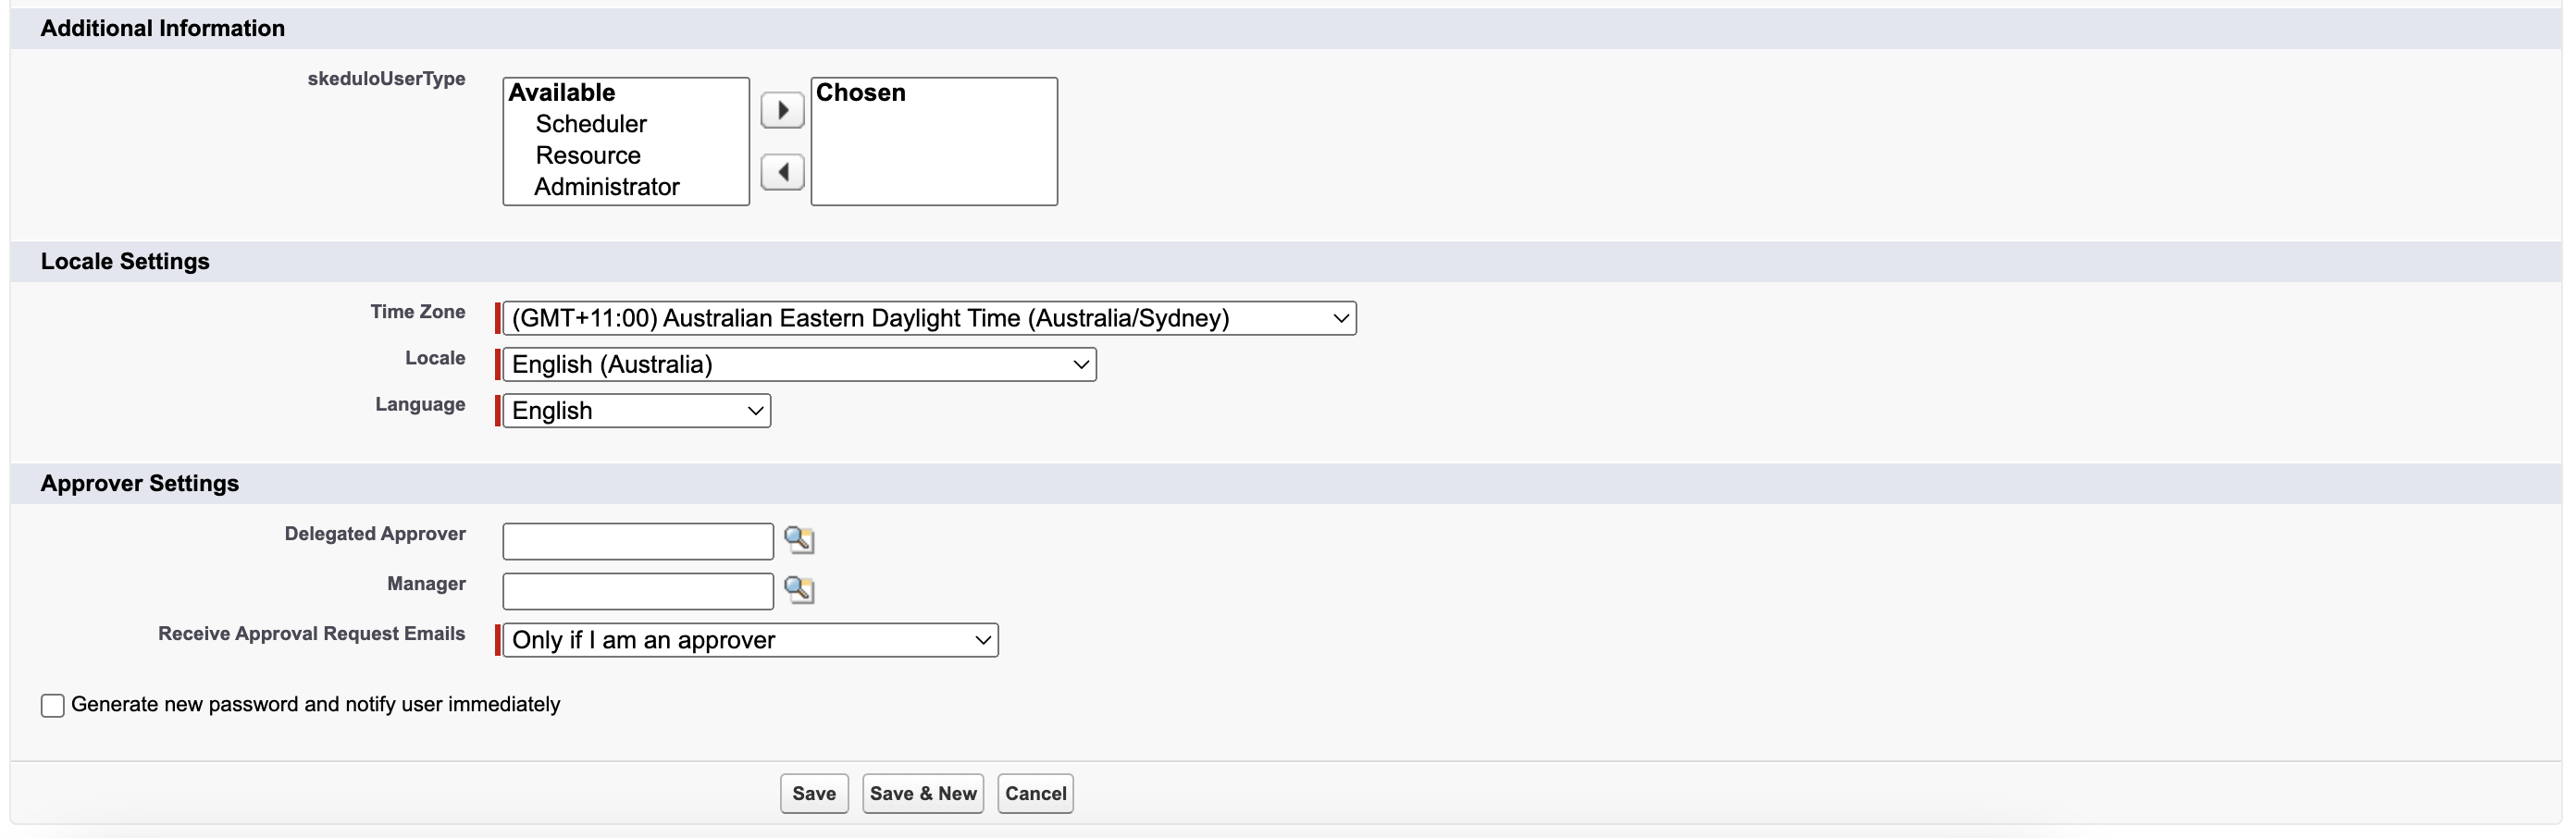
To perform steps 4 & 5, you will need to first save the user record. Before you click that save button though, we want to highlight the checkbox field just above the ‘Save’ button title ‘Generate new password and notify user immediately‘.
When this checkbox is true and the is record saved, an email will be sent promoting the user to log in for the first time. If you are not ready to invite the user at this stage, uncheck this box.
Please note that your user will be able to log into Salesforce when you generate a new password and notify them. If you fail to follow steps 4 & 5, when they log into the system for the first time they will have very limited access.
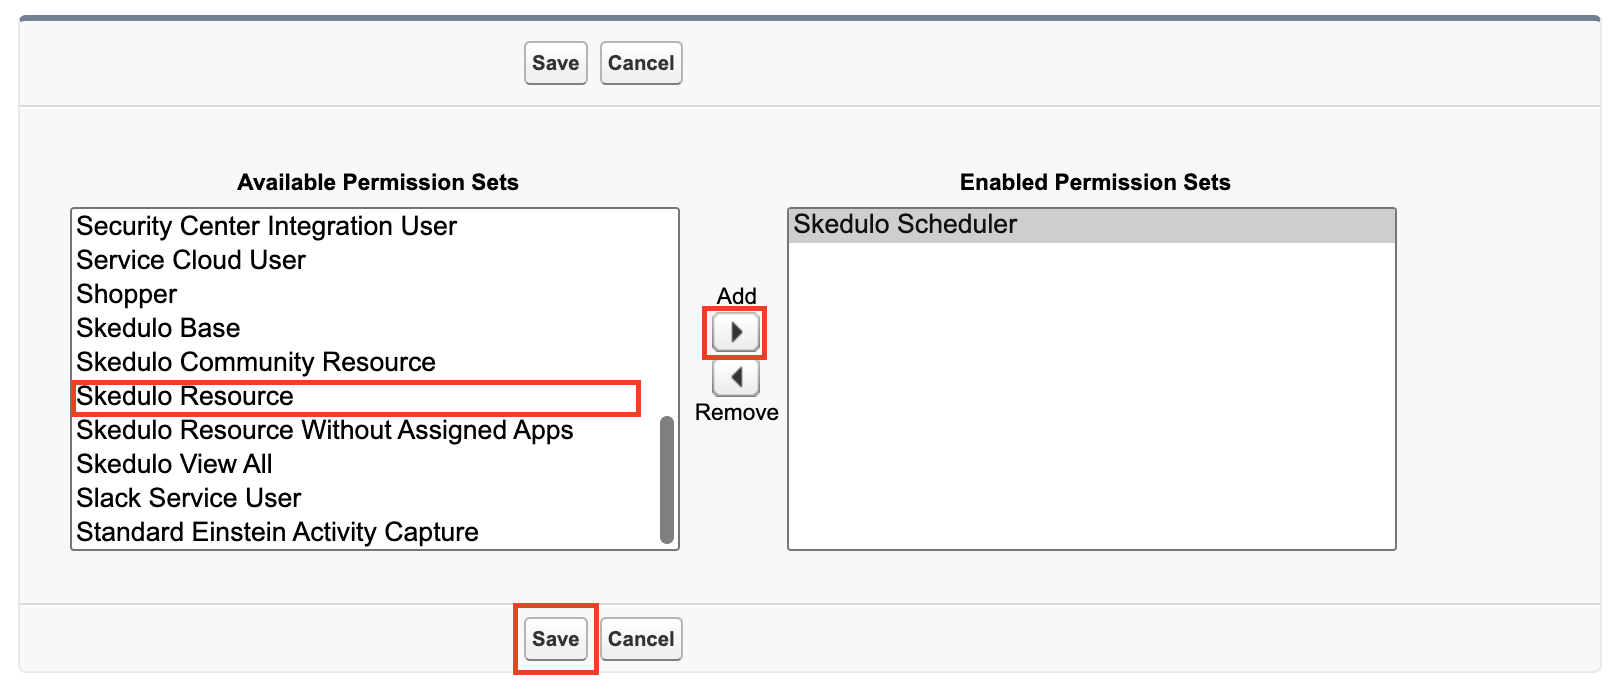
Step 4 – Opening up access using permission sets
Permission sets are used to open up access for a given user. The permissions sets you allocate against a user record will vary depending on the access level they require. The Skedulo package installed into your Salesforce environment has a number of pre-configured permission sets for you to choose from. If you want to dive a little deeper into our permission sets, you can check out this article in our knowledge base.
| Permission Set | Details |
|---|---|
| Skedulo Base | This set gives the user “Read” permissions for all Skedulo objects. This set defines the minimum permissions required for a Skedulo user. Users that are not assigned either a “Scheduler,” “Resource” or “View All” permission set should at least be assigned “Skedulo Base.” |
| Skedulo View All Permission Set | This is a read-only permission set for users who need to view Skedulo data in Salesforce for reporting purposes, but do not need to use the Skedulo web or mobile apps. This permission set does not provide access to the web or mobile app. |
| Skedulo Scheduler | The Skedulo Scheduler permission set contains the Base permission set so that Schedulers can access the Skedulo web app, perform tasks and manage your deskless workforce. |
| Skedulo Resource | The Skedulo Resource permission set contains the Base permission set so that Resources, such as field-based employees, can access the Skedulo mobile app to complete tasks and manage their schedules out in the field. |

Assign permission sets
While viewing the user record
- Scroll down to the section title ‘Permission Set Assignments’
- Click on the button ‘Edit Assignments’
- Highlight the appropriate permission sets
- Click the right arrow to assign the permission sets
- Click ‘Save’
Step 5 – Assigning a Skedulo license
A Skedulo licences is required for all users access the Skedulo data model, Web App and Mobile App. When allocating a Skedulo licence, you will see the total number of allowed licences that have provisioned to your environment along with the number of licences being used by your active users.

Assign a Skedulo license
While viewing the user record
- Scroll down to the section titled ‘Managed Packages’
- Click on the button ‘Assign Licensees’ (A new tab will open)
- Check the box next to the package ‘Sked’
- Click ‘Save’
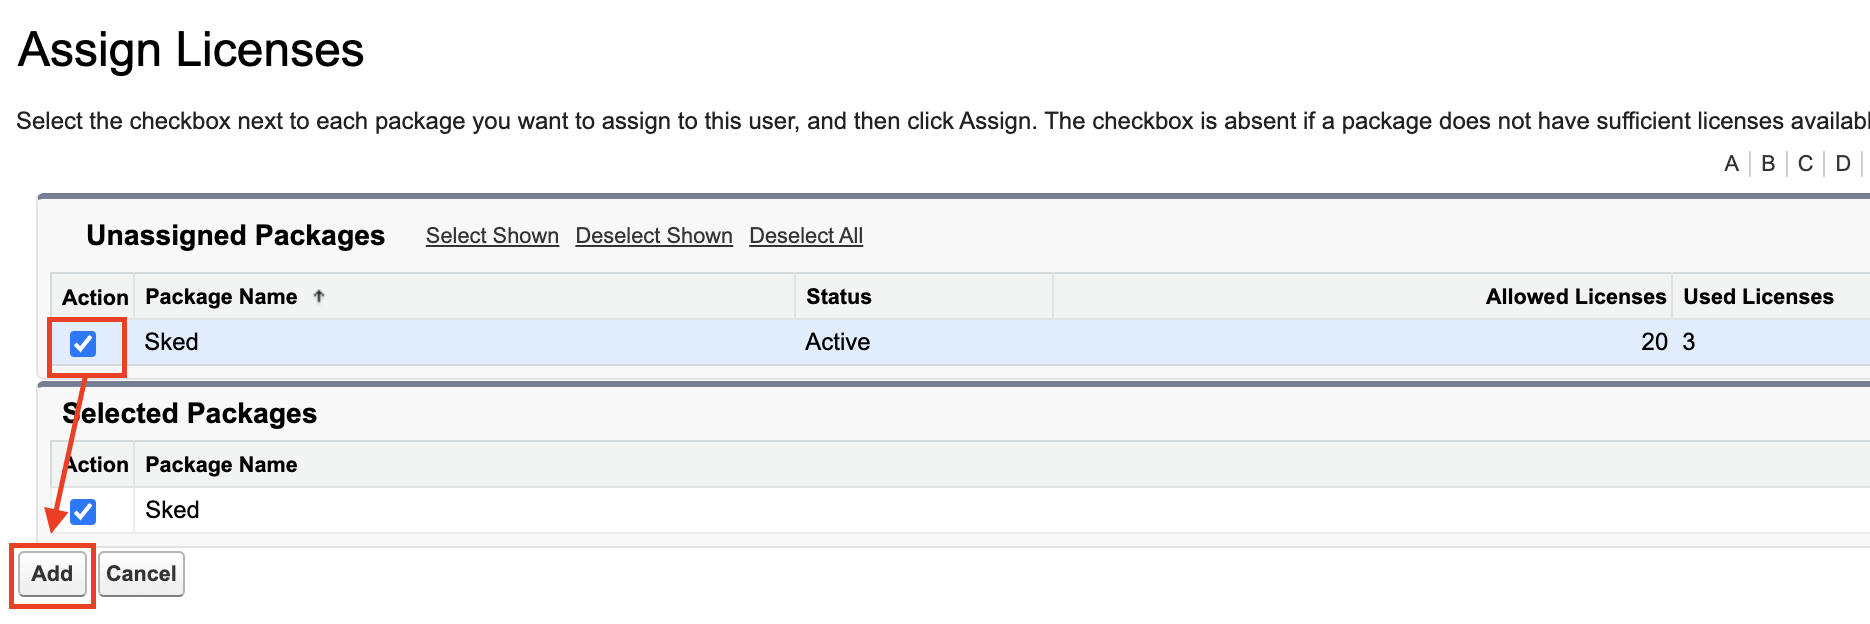
If you don't have enough licences for assignment, you can contact your Customer Success Manager to order more.